Getting started
Set up your account and understand the main project structure.
Learn the workflow step by step
Follow a practical learning path from account and site setup to plant recipes, visual plans, analysis and professional output.
Why it helps
The tutorial path follows the same order as a real project. Start with the site, add plant logic, create the plan and only then move into analysis, presentation and export.
Set up your account and understand the main project structure.
Add a location, boundary and known site conditions.
Search the database and create reusable planting combinations.
Place plants and organize the design on the map.
Review the project through additional visual and seasonal perspectives.
Prepare plans, lists, backups and exports for practical use.
From start to result
Start with what you know and refine the project as new information becomes available.
Choose the topic that matches your current project step.
Apply the action immediately so the explanation becomes practical knowledge.
Use the documentation or contact support when a project raises a deeper question.
Product views
See AgroForest Designer in action with a sample project.
Product capture
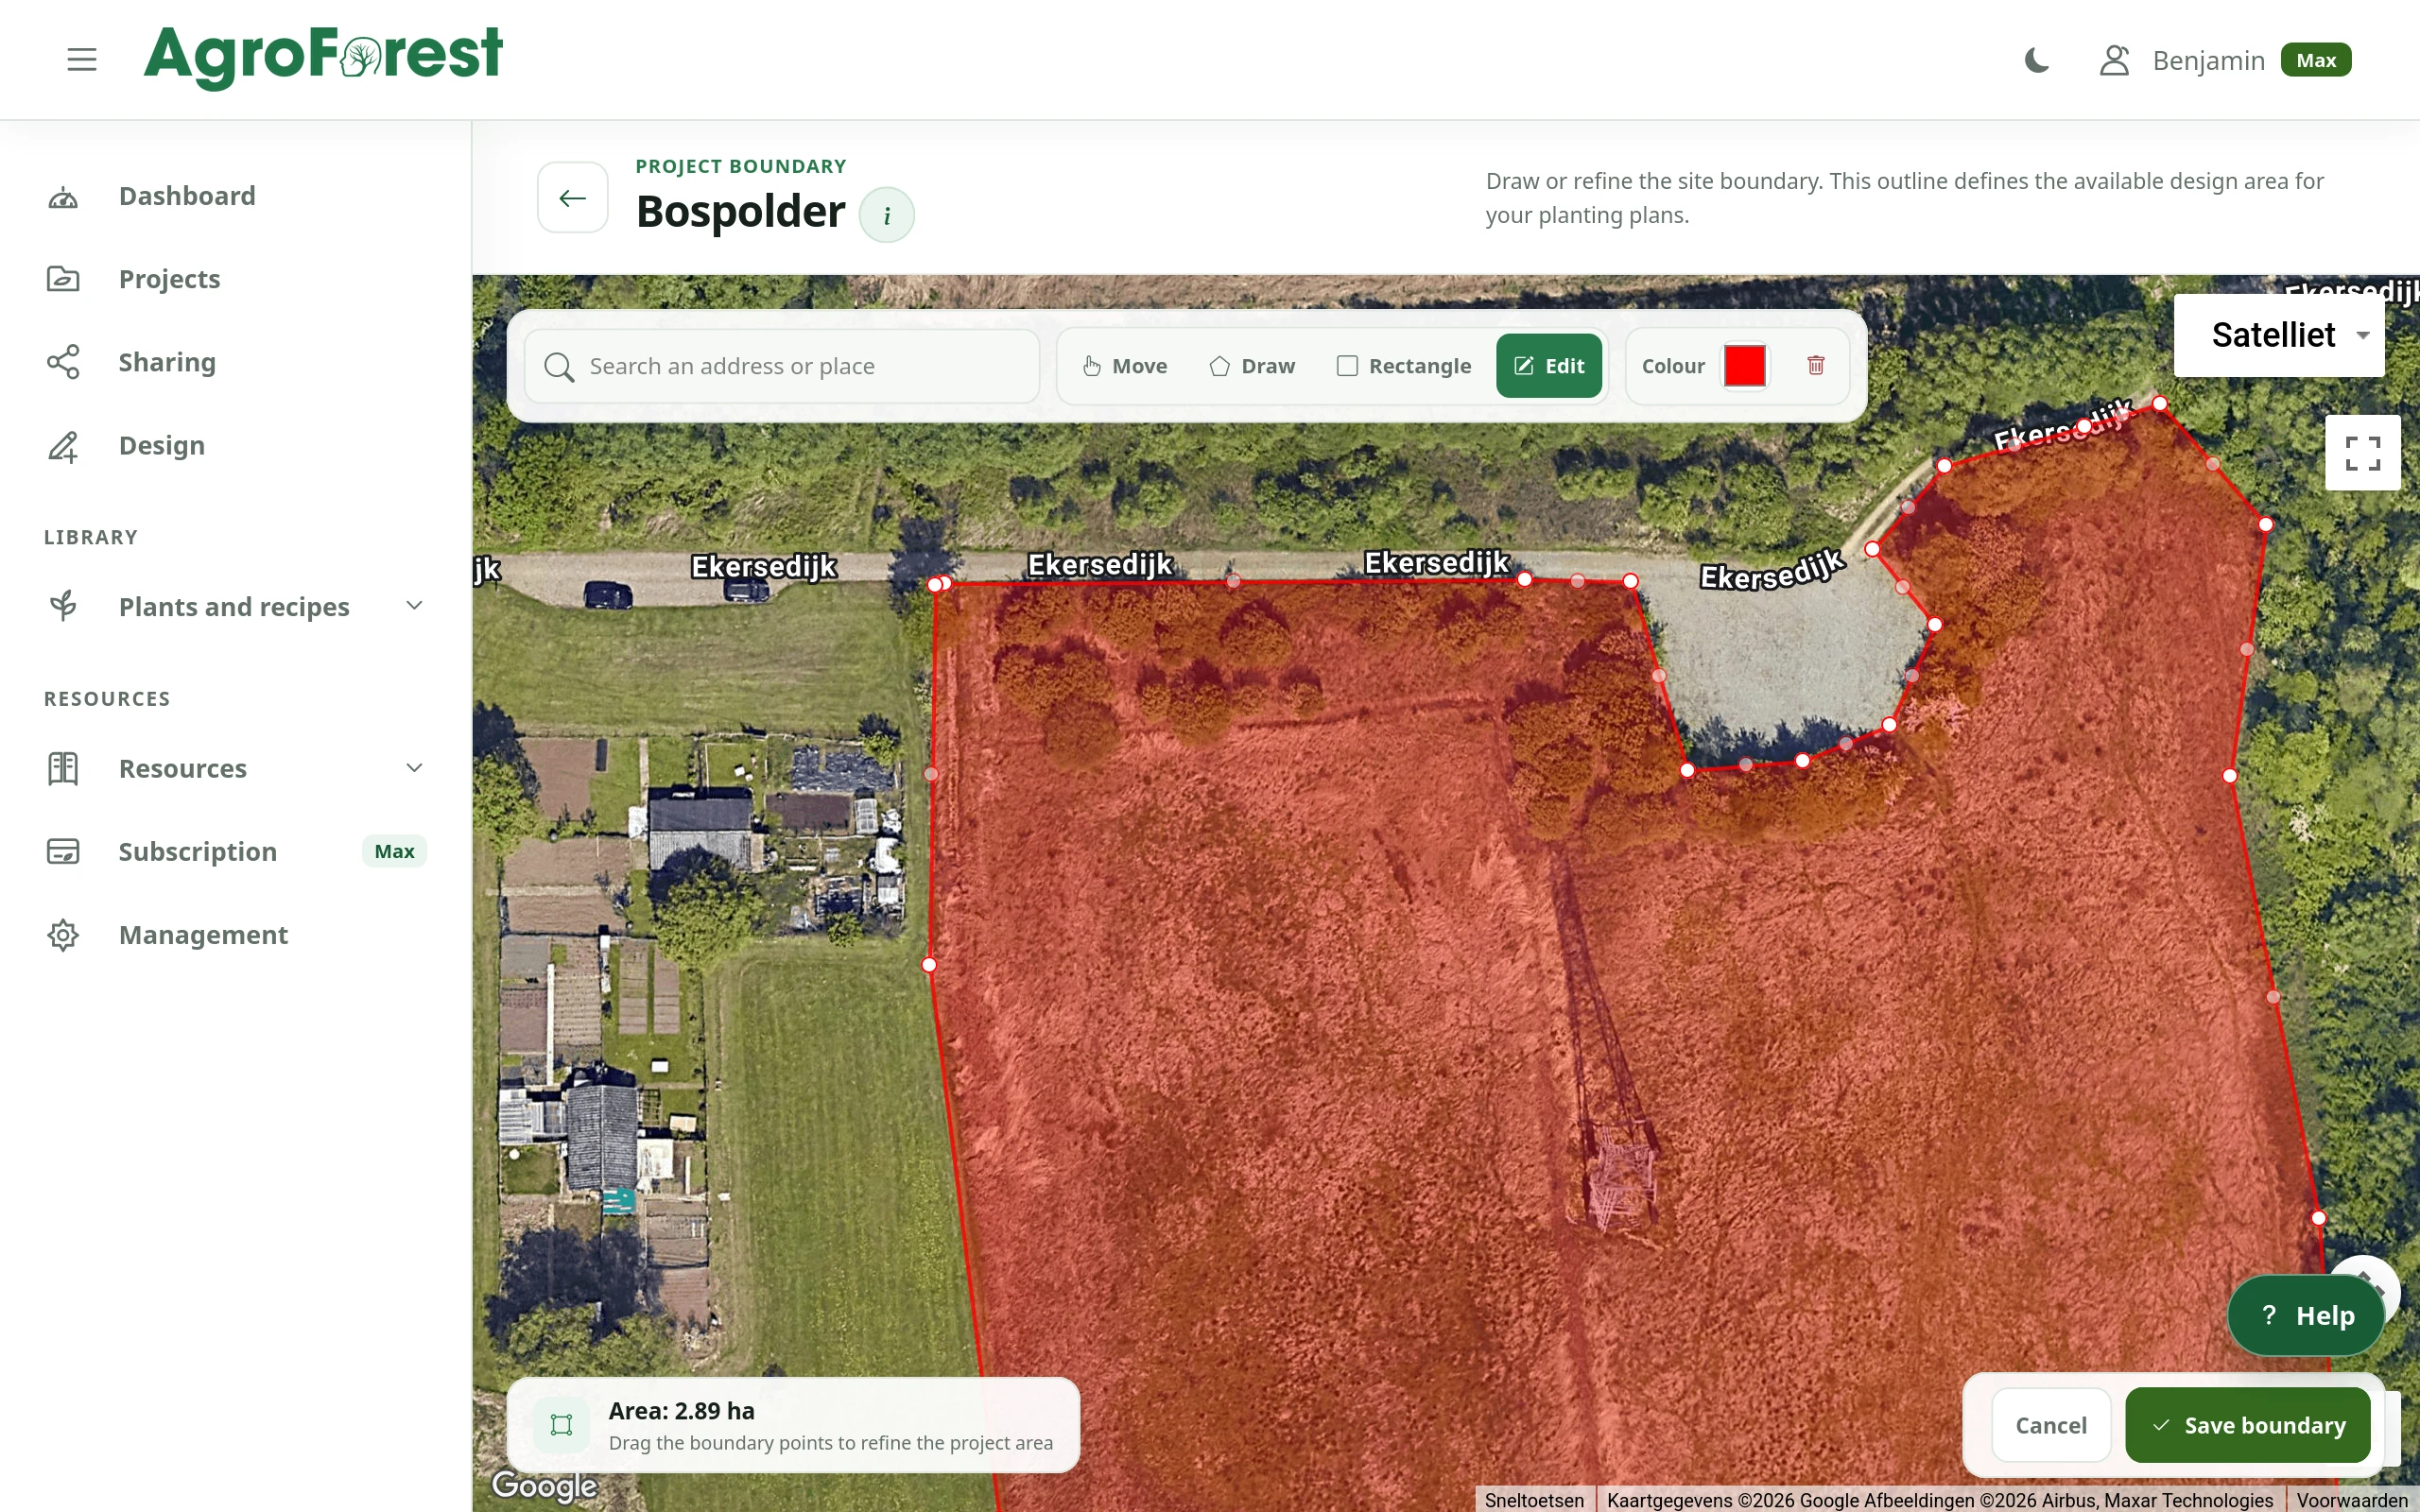
Set the project area against real-world imagery before developing the planting plan.
 Product capture
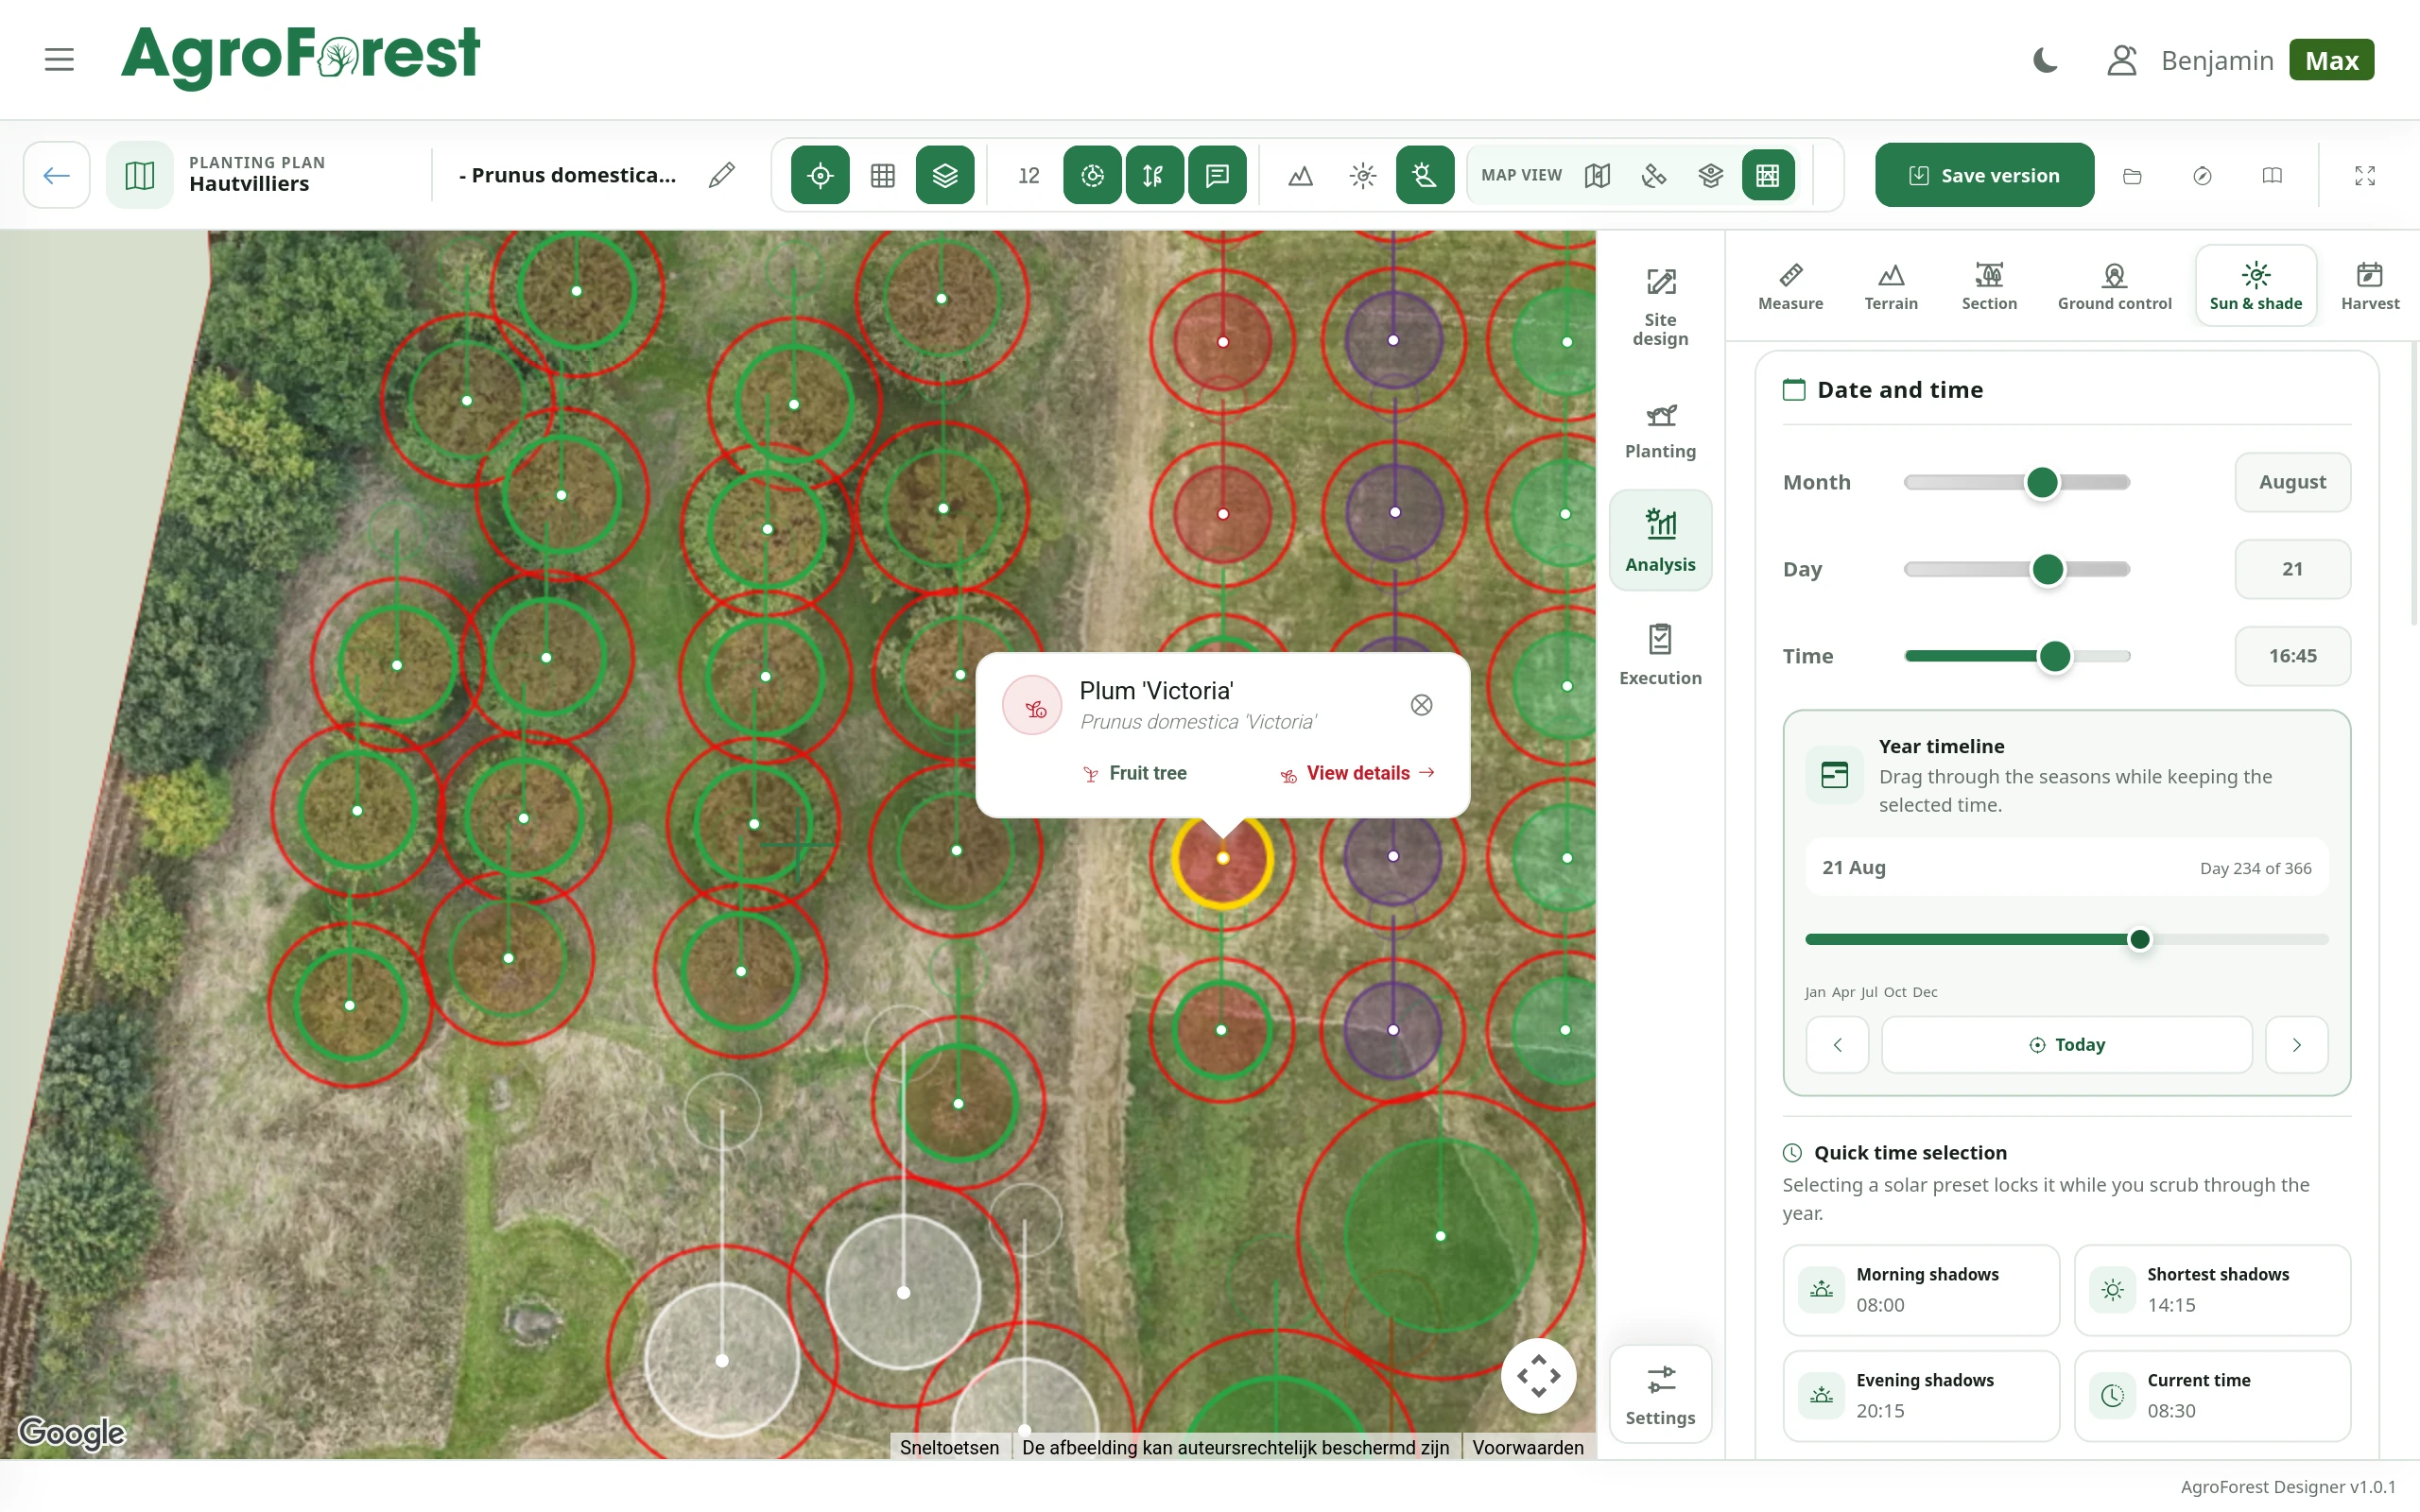
Review plant positions, mature spread and layout directly on the aerial image.
 Product capture
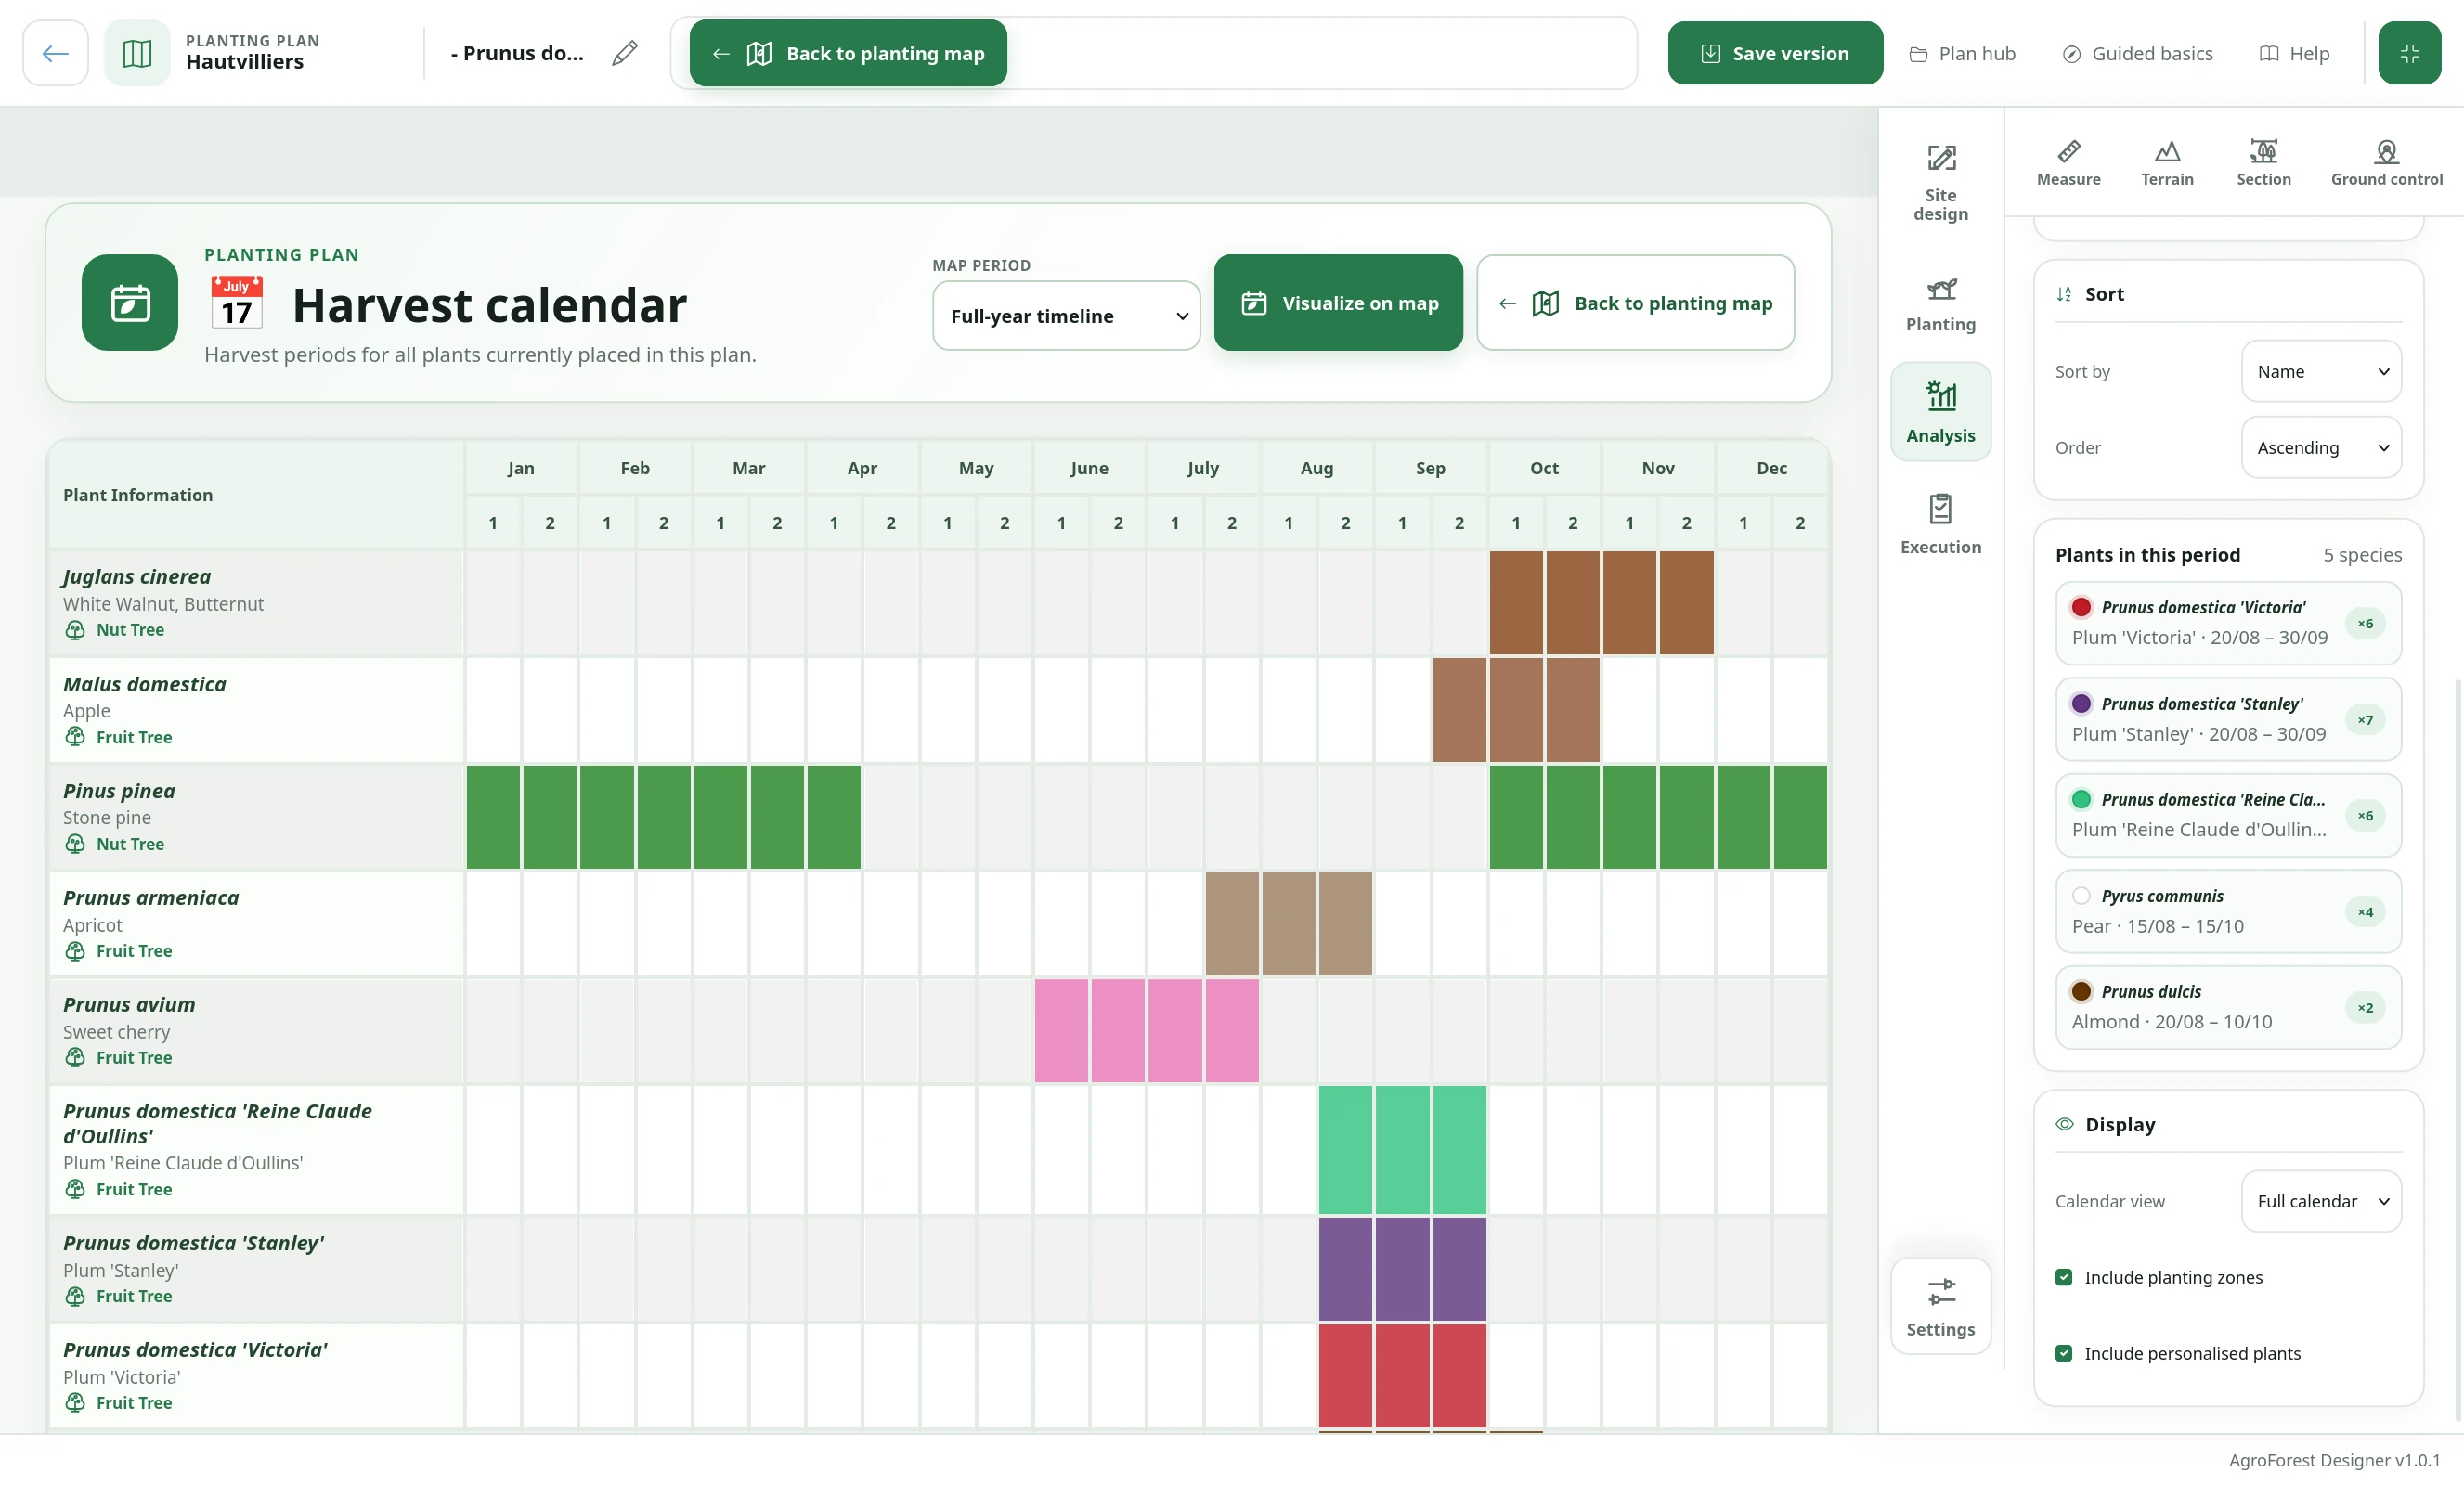
Compare harvest periods across selected species and spot gaps in the year.
FAQ
Start with account setup, then create a first project and define the site.
Public learning material can be viewed without a paid subscription.
Use the documentation for detailed guidance or contact support with a specific question.
Your design starts here
Start without payment details. Add capacity or professional features later, when your project needs them.