Start with the site boundary
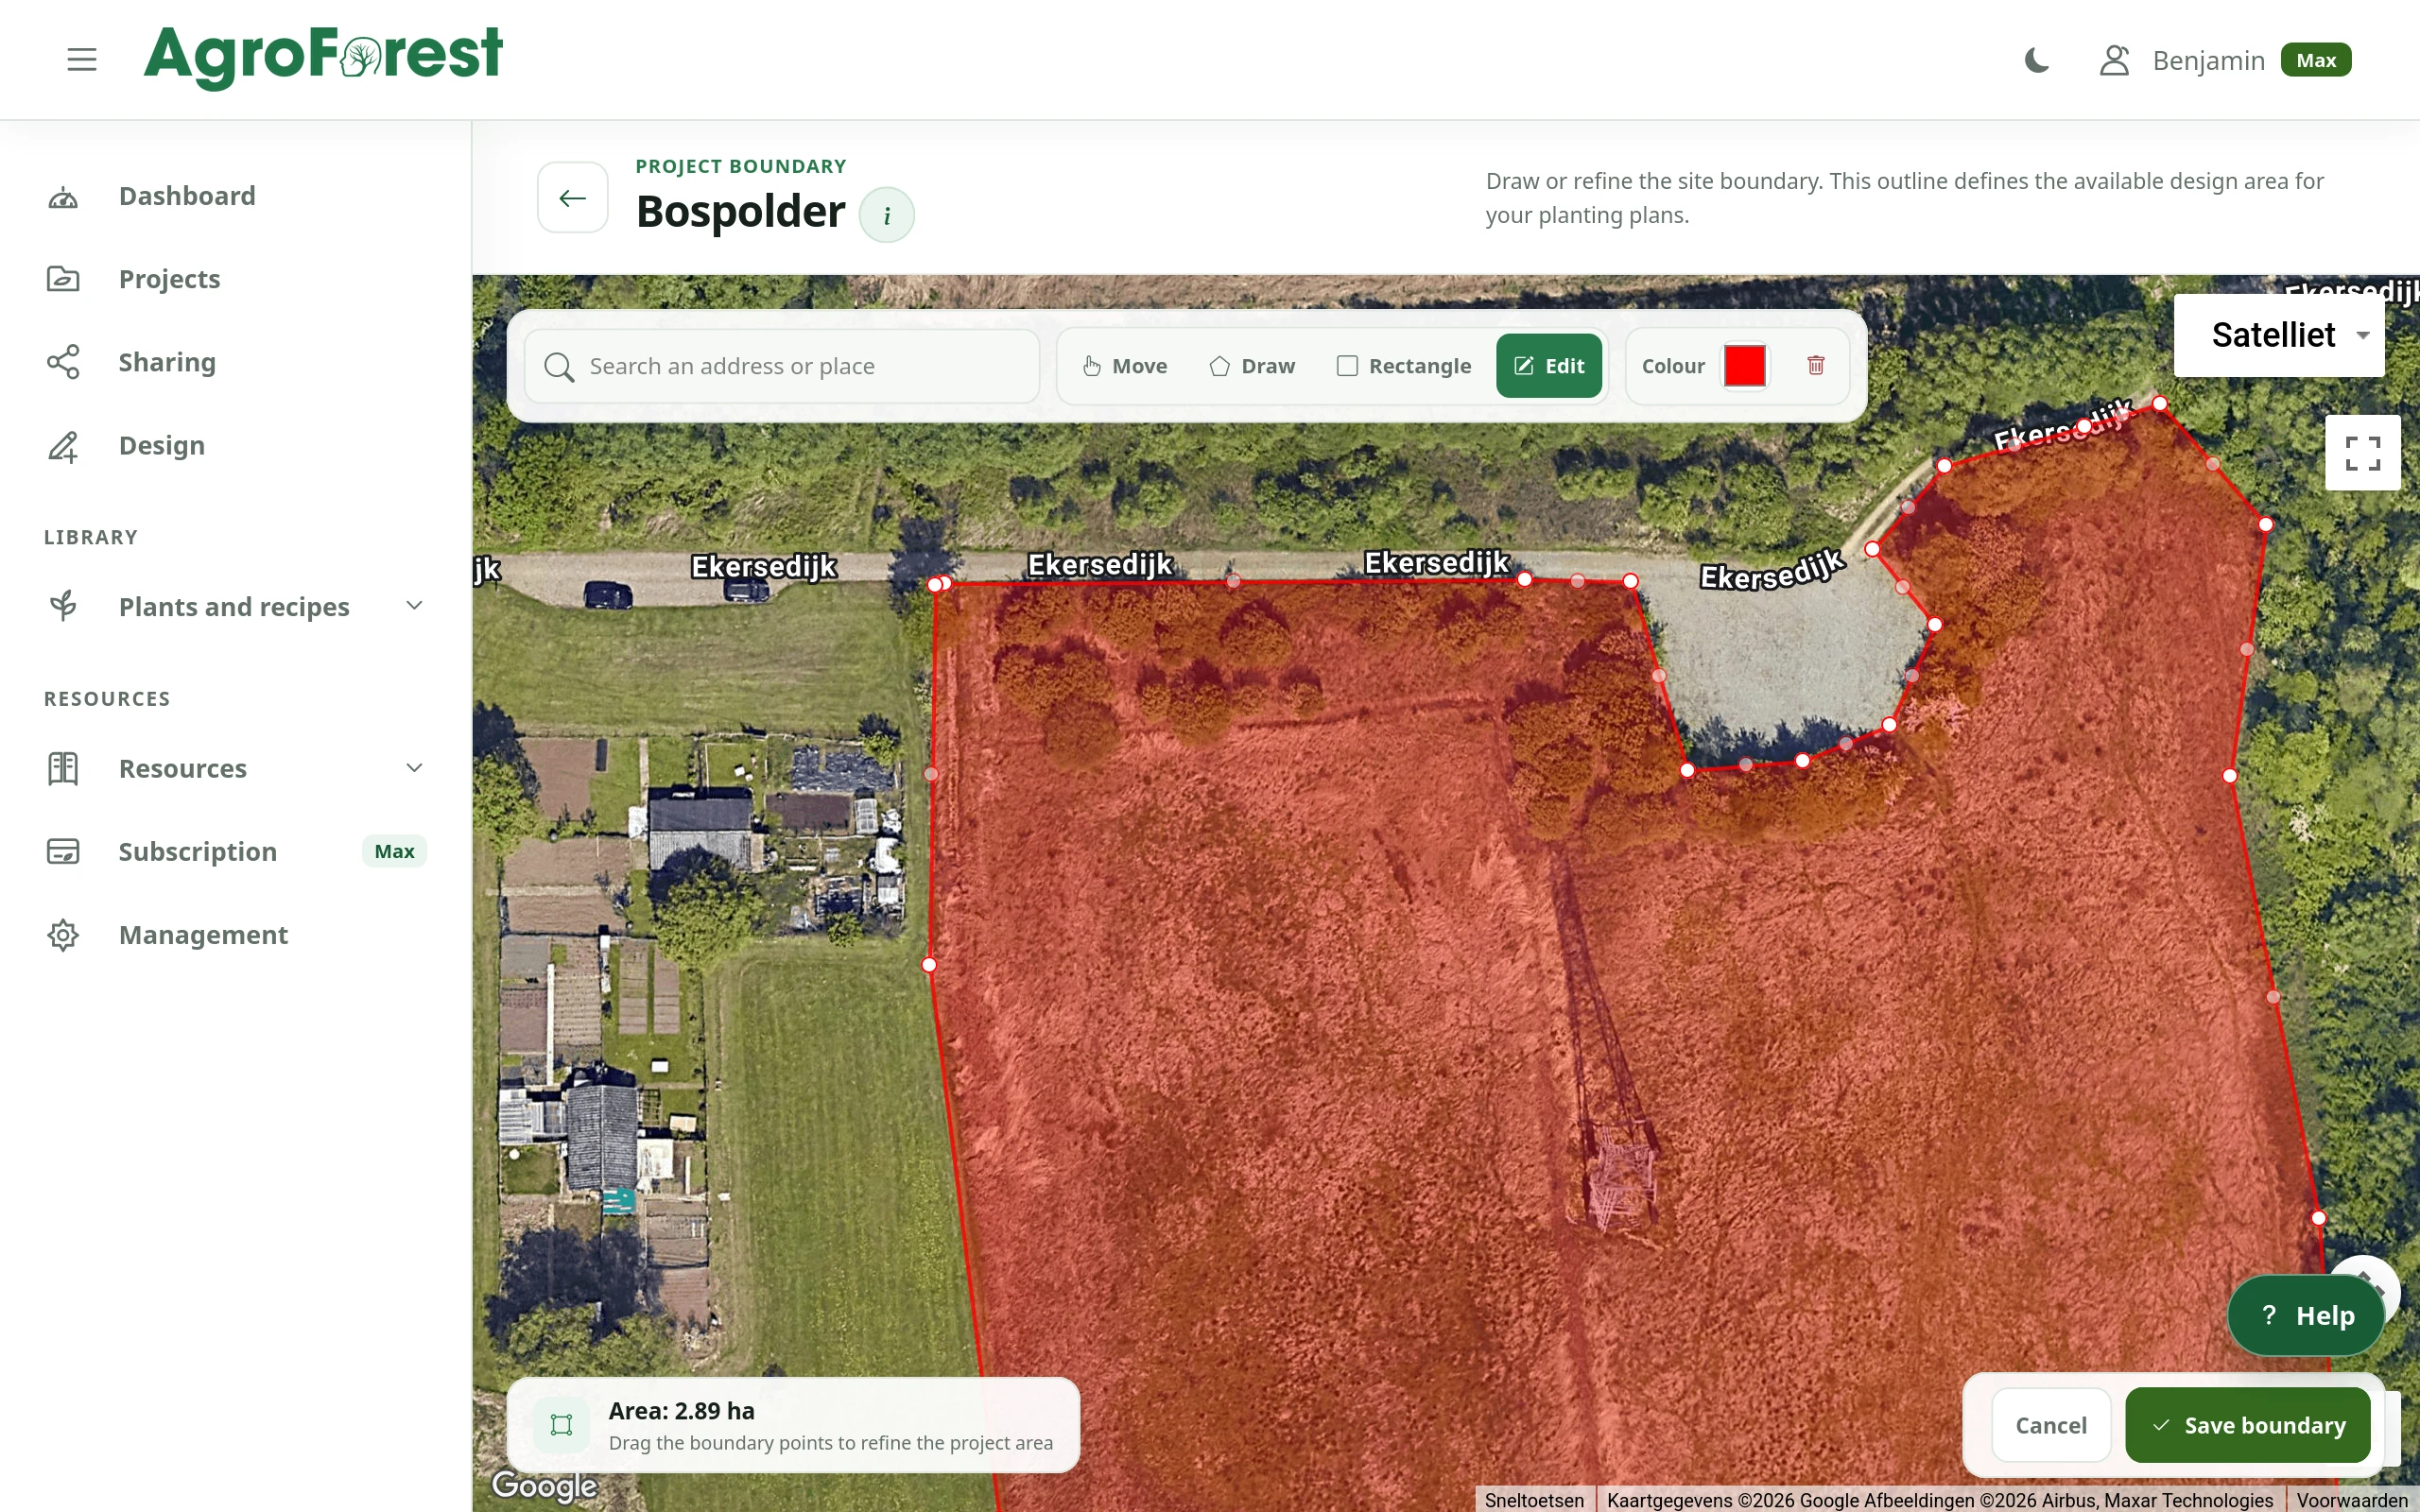
Position the project on a map or aerial image, then add known buildings, water and other site elements.
Map, plant and review
AgroForest Designer is browser-based agroforestry design software for food forests and layered planting systems. Map your site, select plants, generate an editable layout and review spacing, growth and indicative shade before preparing your planting plan.
Why it helps
A tree's footprint changes as it grows. Paths need room, understory plants need suitable light, and planting choices depend on the site. Keep these decisions together: research a plant palette, draw the physical layout, then inspect how the recorded plant dimensions affect your design.
Position the project on a map or aerial image, then add known buildings, water and other site elements.
Draw paths, planting rows and zones before filling the available area with trees, shrubs and lower layers.
Choose a recipe, planting density and design horizon. Review a temporary proposal, its plant count and any warnings before applying it.
Filter recorded soil, light, hardiness and plant dimensions, then keep your selected species and cultivars together in a recipe.
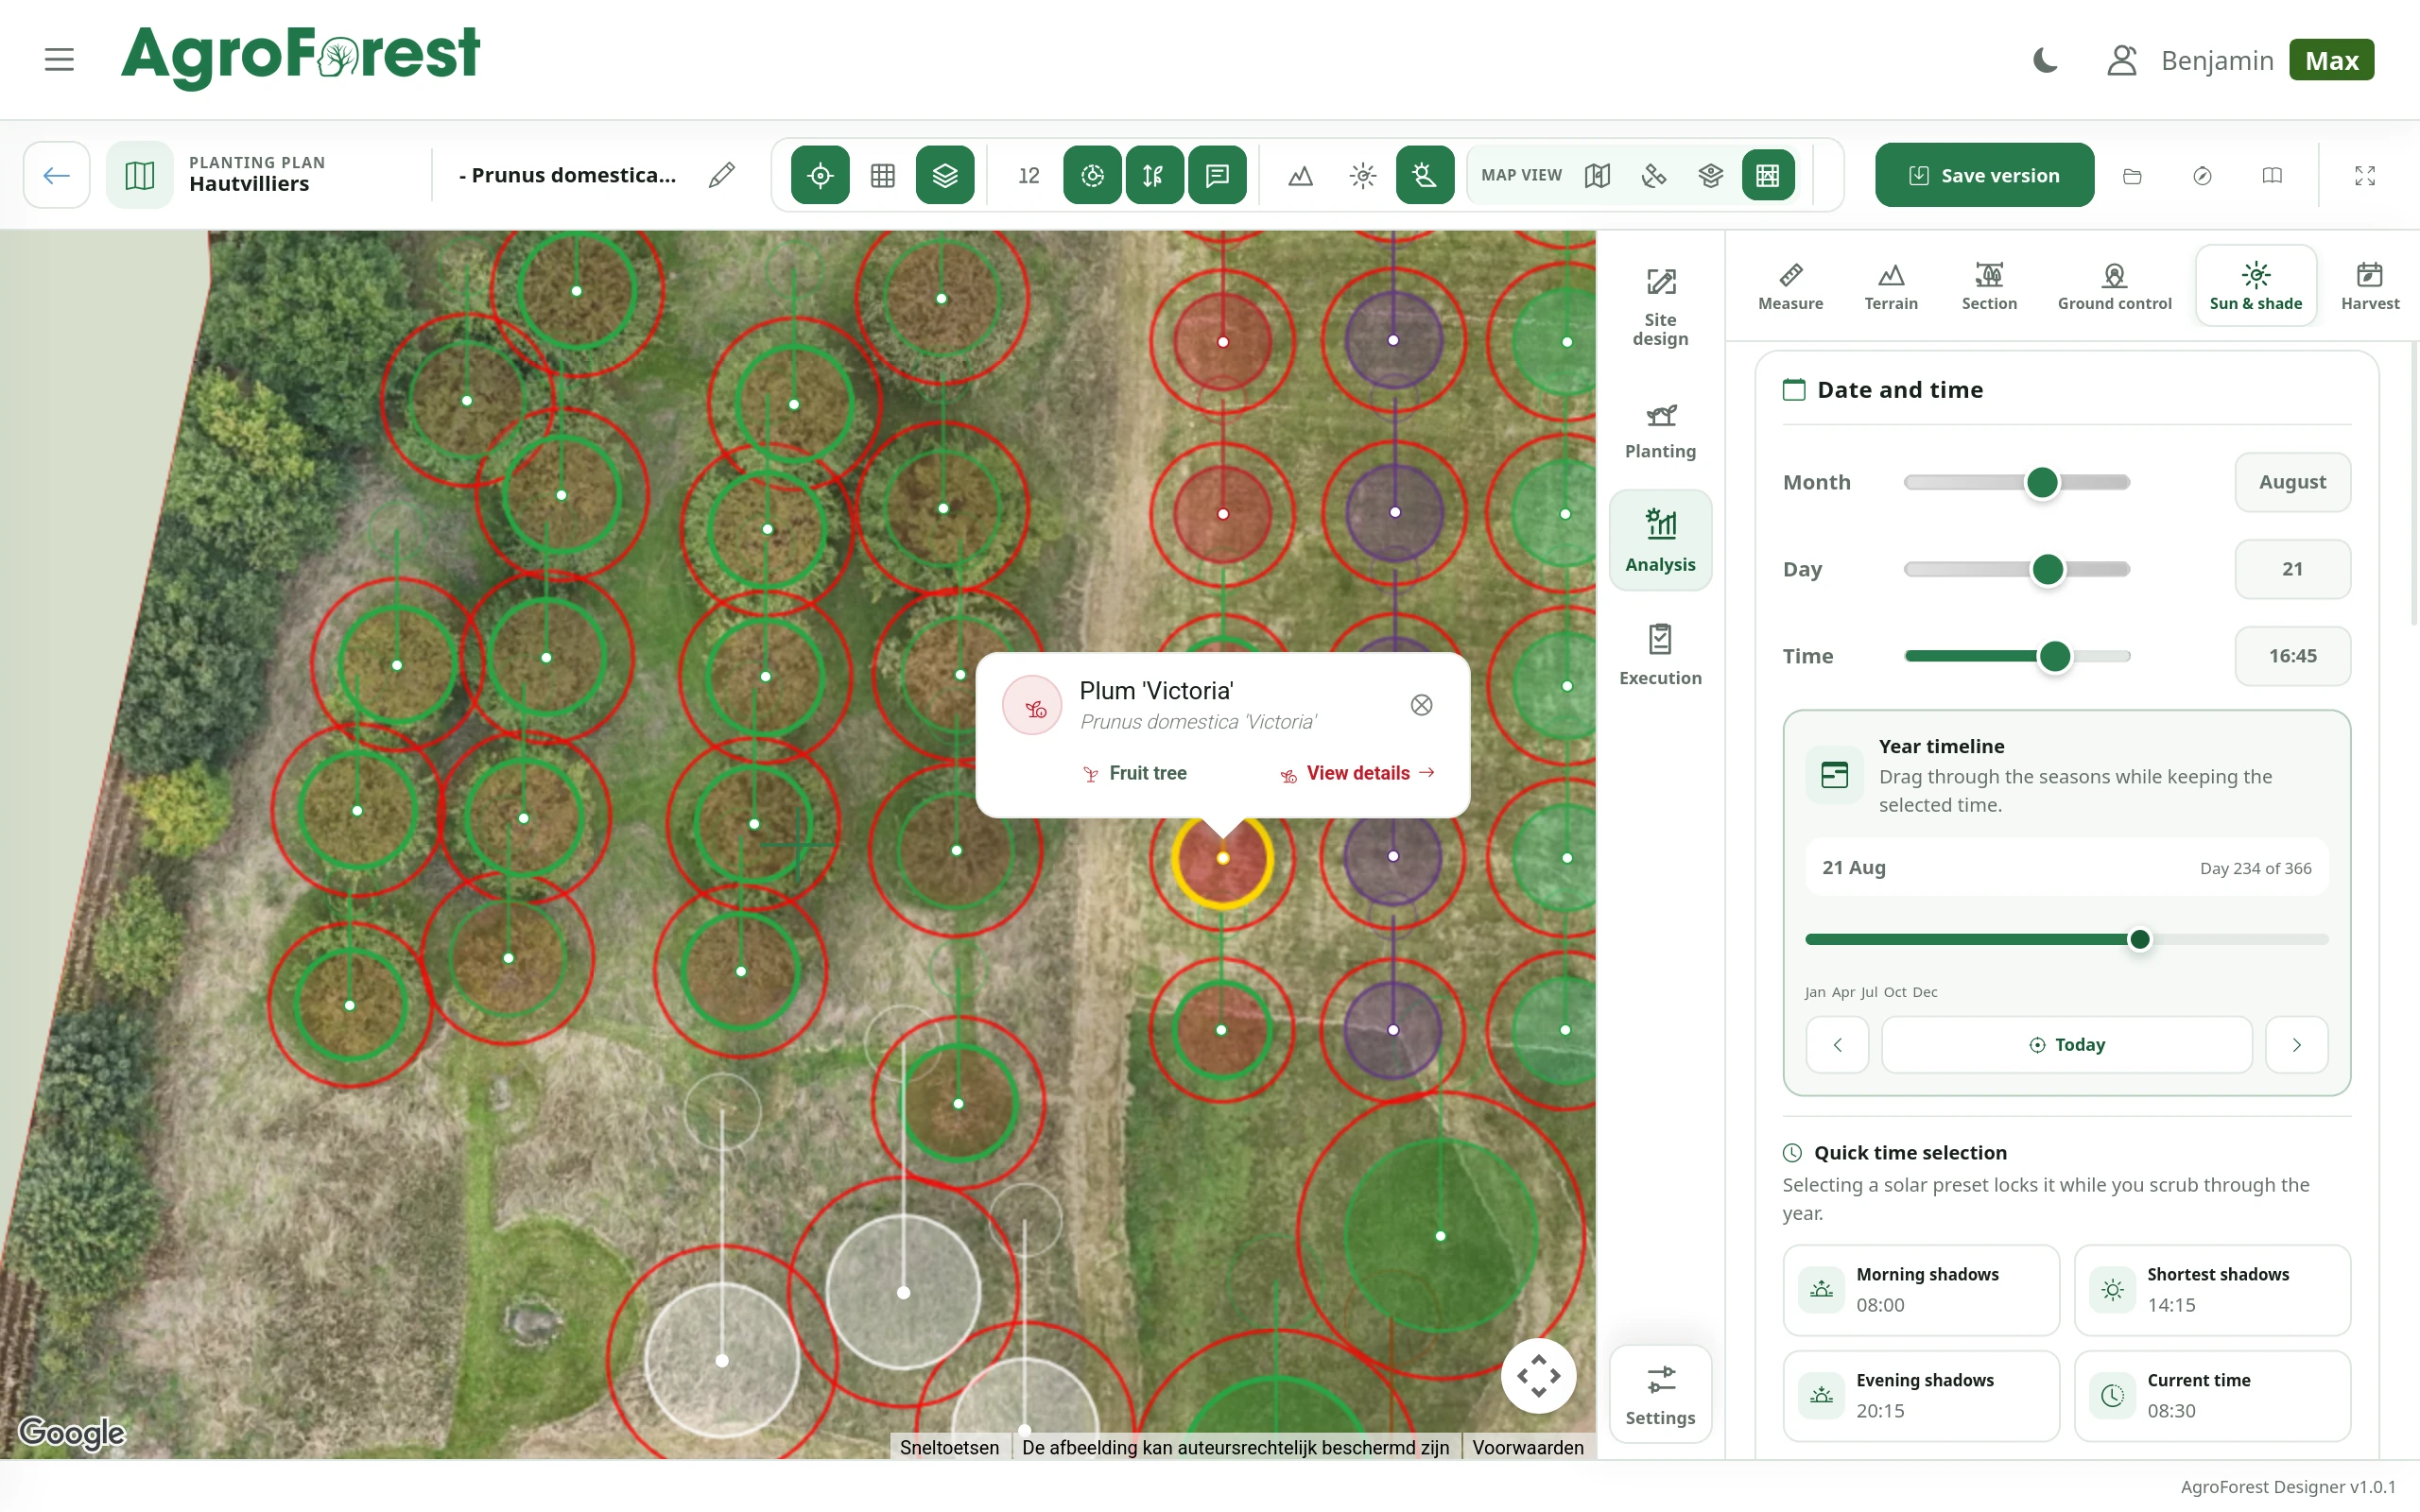
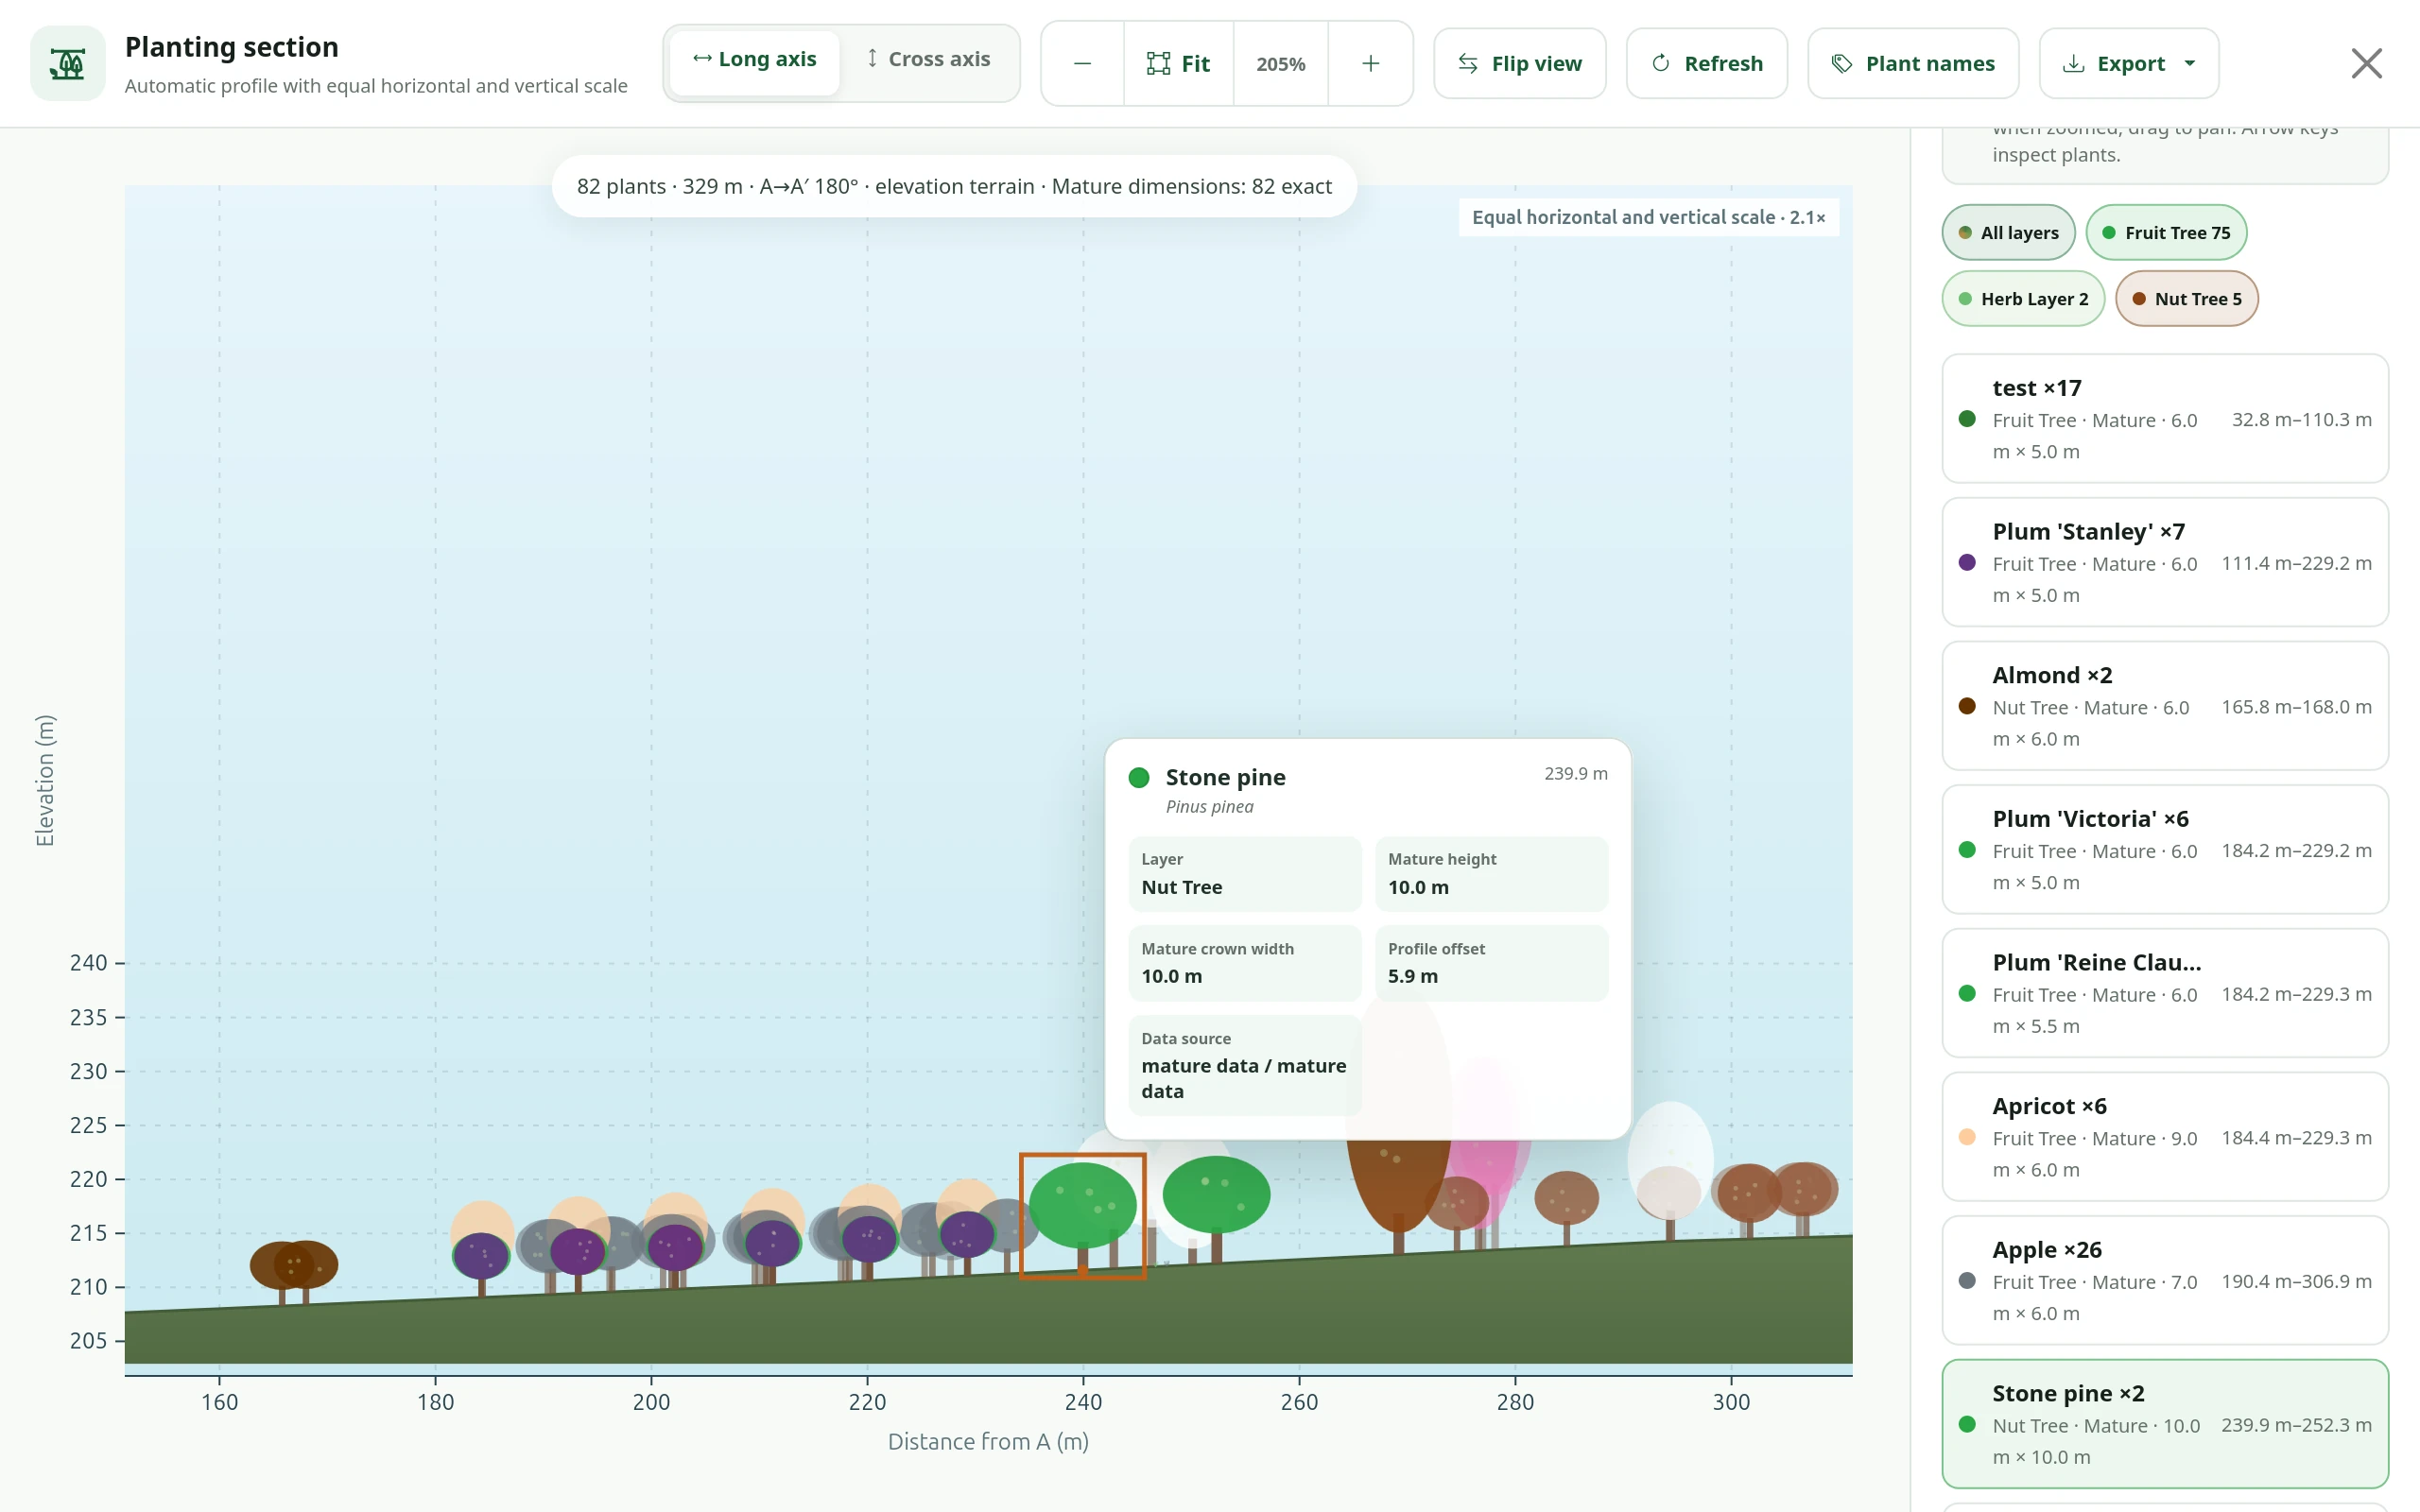
Inspect crown sizes, spacing, sun paths and indicative shade alongside terrain contours and seasonal harvest periods.
Move plants, adjust paths and regenerate one planting layer while keeping other layers and manual placements. Save versions as the design develops.
From start to result
Bring a location, a usable site boundary and what you know about growing conditions. Build the plan in stages and verify important assumptions on site.
Draw the boundary, check it against field measurements, and mark existing objects, paths and areas you intend to plant.
Use the public plant search to build a recipe. Check local suitability, mature size and cultivar requirements before linking it to the project.
Place individual plants and rows manually, or paint an allowed planting area and generate a layout using your selected density and growth horizon.
Review generator warnings, plant spacing, access and indicative light conditions. Adjust the layout and save a named version.
Review the inventory and harvest periods. Use the output available in your plan to support discussion, purchasing and implementation.
Inside the planner
Combine manual design with generated planting layers. Each tool exposes a different part of the plan, from the site boundary to the information you need for planting.
Keep the planting layout aligned with the project location and the site features you have recorded.
Reserve access to planting areas and inspect path dimensions while you develop the layout.
Create a starting layout from a linked recipe, a painted planting area and your design preferences.
Carry the species and cultivar choices from plant research into the spatial design.
Look for potential conflicts in plant spacing, sunlight and site structure, then check critical findings in the field.
Review the inventory as the layout changes. Pro and Max add professional delivery and presentation tools.
Product views
These product captures use a demonstration project to show the information you can inspect while developing a layered design.
Product capture
Set the project area against real-world imagery before developing the planting plan.
 Product capture
Review plant positions, mature spread and layout directly on the aerial image.
 Product capture
Review mature plant heights, crown widths and terrain elevation together in an exportable profile view.
FAQ
Use the workspace for spatial planting designs such as food forests, edible tree and shrub layers, planting rows and orchard understories. Map the elements your project needs and check its site-specific requirements; the software does not validate every farming system or predict its financial performance.
Yes. You can map the site, draw paths and planting areas, record existing features and arrange layered planting. These tools support the spatial part of a permaculture design; local observation and the wider design process still guide your decisions.
It creates an editable proposal from a linked plant recipe, the permitted planting area and your chosen density, objectives and design horizon. Review its assumptions and warnings before applying it. You can also design manually or regenerate one layer while retaining other layers and manual plants.
Growth views use recorded plant dimensions. Shade is an indicative model based on plant sizes, seasonal leaf assumptions and mapped raised objects; it does not include terrain or every surrounding obstruction. Verify critical spacing and light conditions on site.
The Free plan includes the core site, planting, path, generator and analysis workflow within its account limits. Pro and Max add tools including technical drawings, 3D visualization and plan sharing. Check the plan comparison for current allowances.
Use the documentation for individual tools, or follow a design example before starting your own project.
Your design starts here
Start without payment details. Add capacity or professional features later, when your project needs them.