Keep client sites organised
Use separate projects with their own location, boundary and plans. Develop alternatives as separate plans or saved versions.
For designers and advisers
Develop food forest and agroforestry planting plans for client work in AgroForest Designer. Keep site geometry, plant selections, design versions and delivery outputs connected, from the first brief to technical drawings, plant inventories and client presentations.
Why it helps
A client needs to understand the design, and the people planting it need usable information. Work from the same saved plan when reviewing plant positions, explaining canopy layers, checking quantities and preparing outputs. Record assumptions and verify the site details that matter for delivery.
Use separate projects with their own location, boundary and plans. Develop alternatives as separate plans or saved versions.
Reuse planting recipes and cultivar selections, then refine positions, paths and generated layers for the specific brief.
Use plant dimensions, section views and professional 3D visualization to discuss scale and the relationship between planting layers.
Create professional PDF or SVG drawings and review the planting inventory against the saved plan before issuing it.
Create a viewing link for the saved planting plan. Manage its access and use plan notes to keep design context with the project.
Prepare purchase lists, record planted specimens and work with GeoPackage exports or the QGIS integration where the project needs a GIS workflow.
From start to result
Use the core tools to develop the design. Pro and Max provide the professional drawing, sharing and presentation capabilities described here.
Record the location, boundary, existing features and known growing conditions. Check critical dimensions against the survey or field measurements you are using.
Link a researched plant recipe, arrange planting and access, and use generated layers where useful. Save the versions you want to compare.
Explain the plan with planting views, recorded growth dimensions and 3D. Use shade and spacing checks to identify questions, then revise the proposal.
Save the current plan, review its inventory and export the required drawings or GIS data. Keep purchasing information and implementation records with the project as work progresses.
Product views
These captures show the presentation tools using demonstration data. Choose outputs that match the brief and make the assumptions behind each view clear.
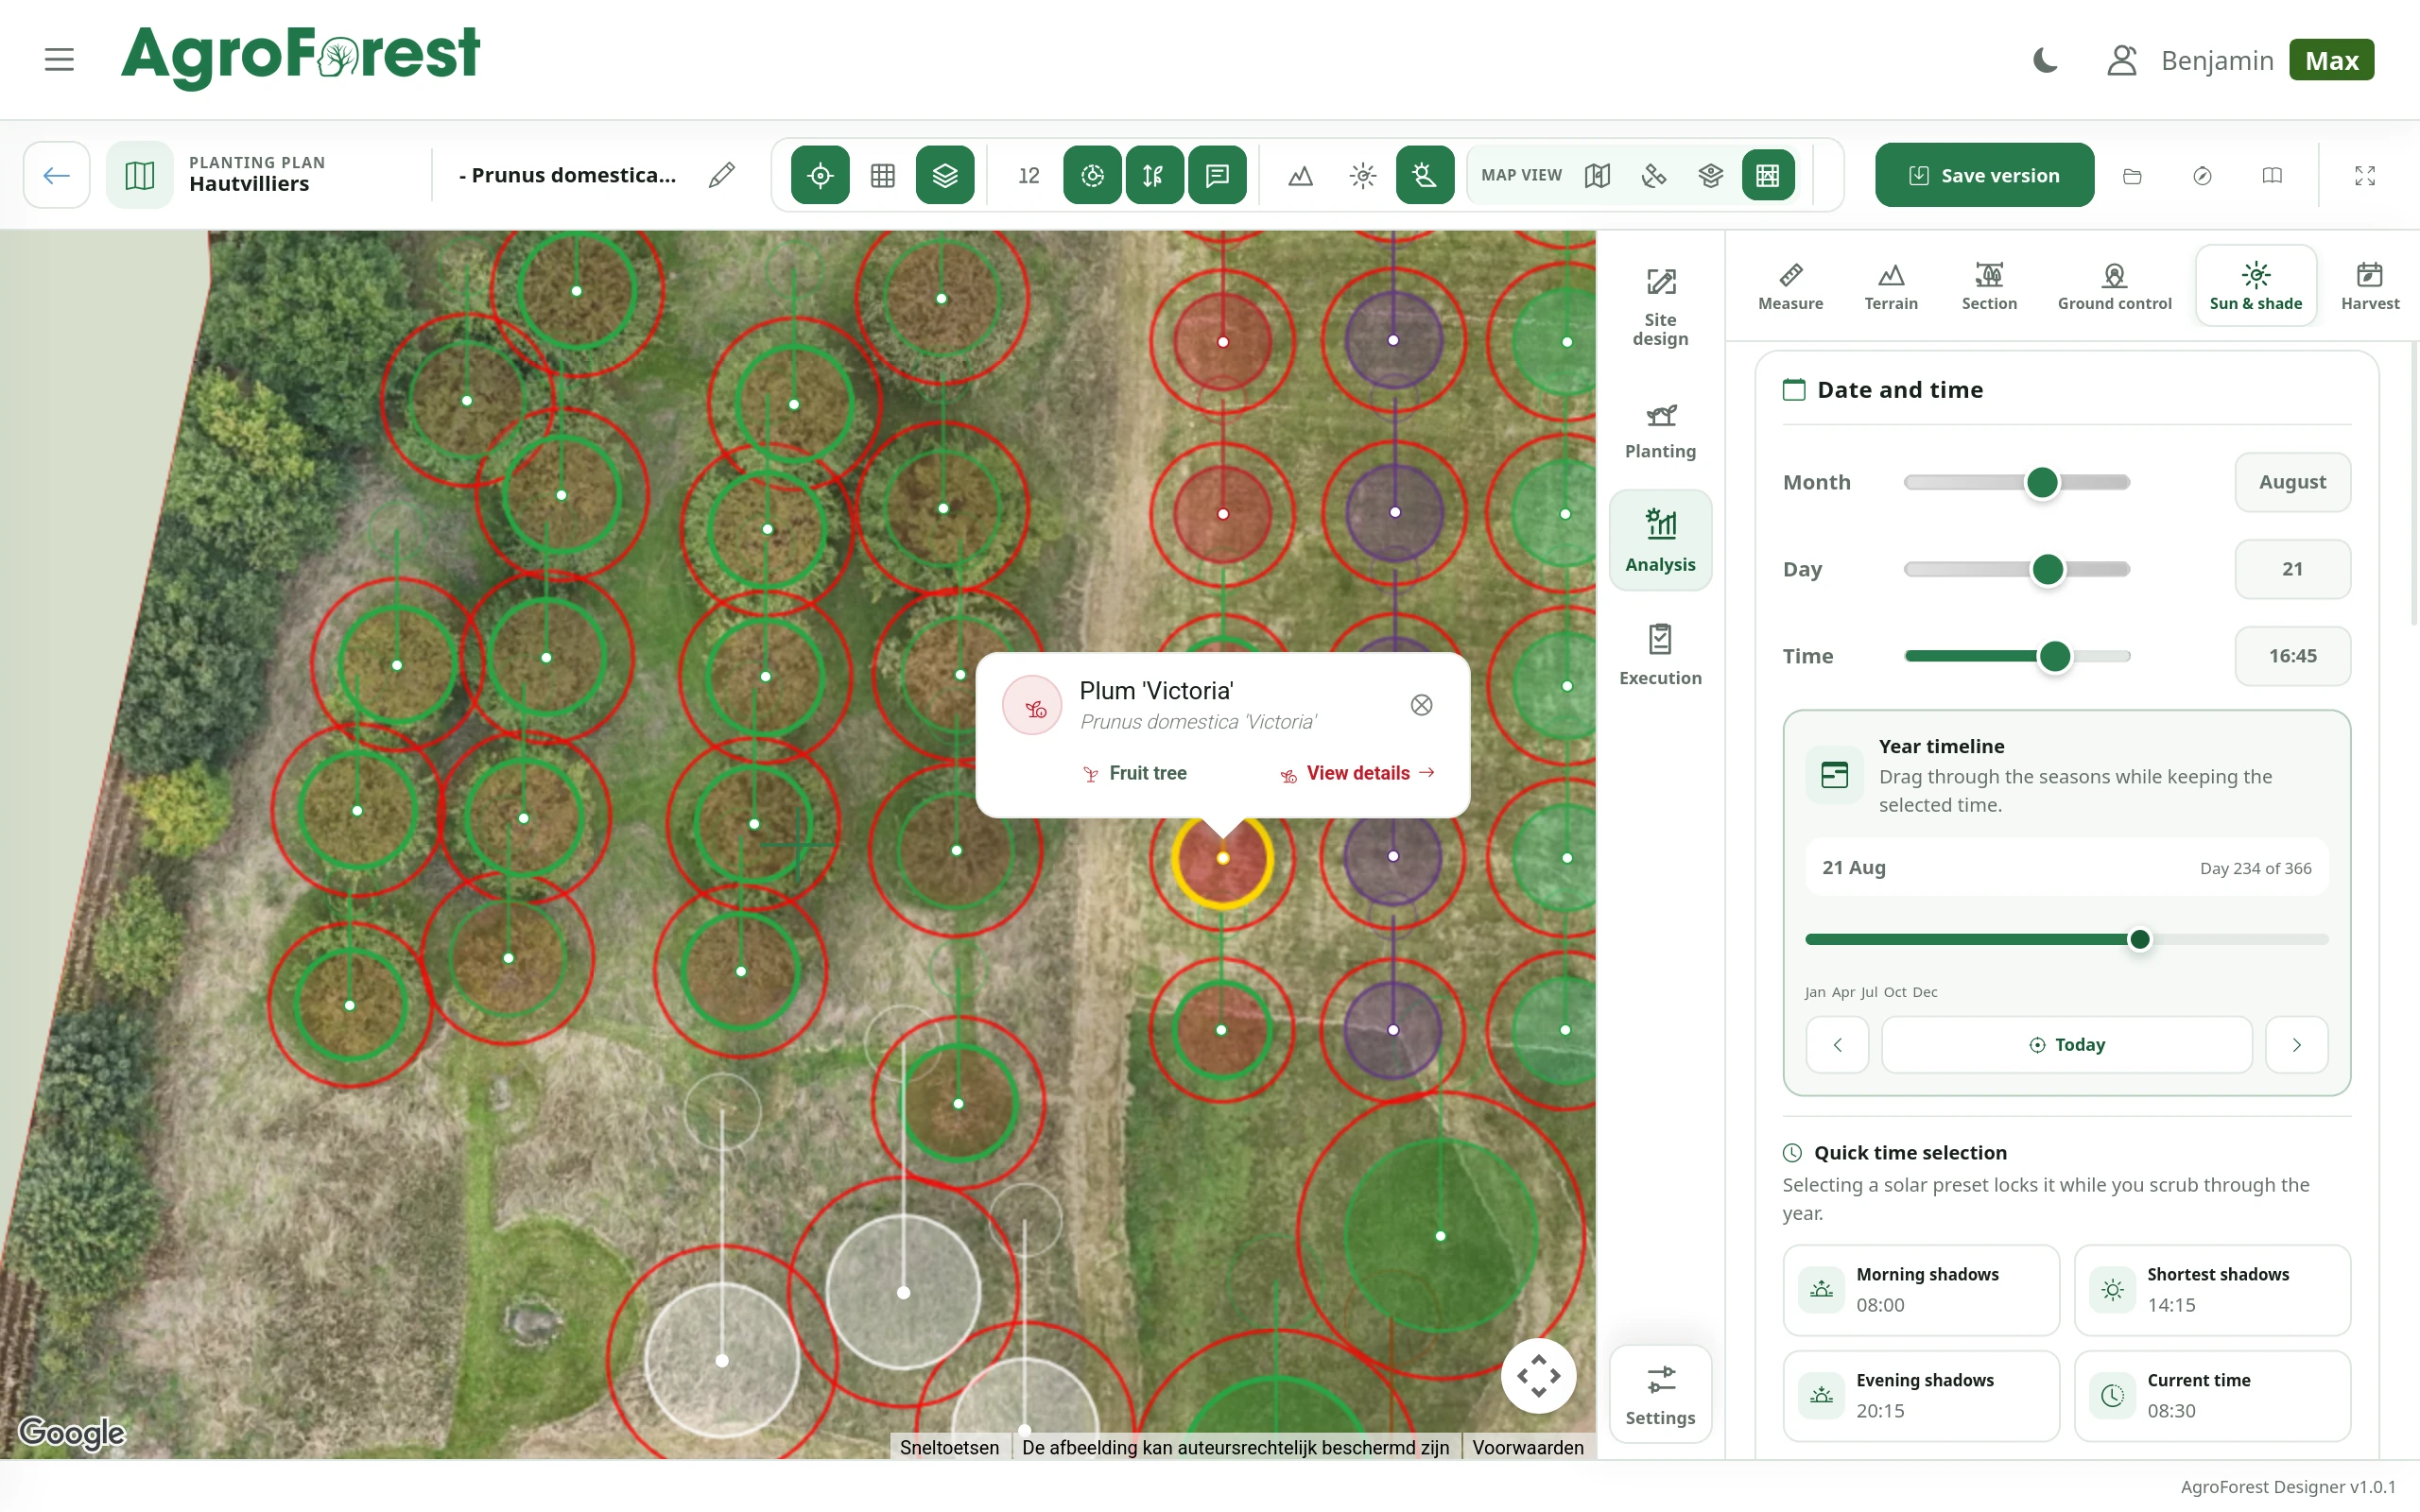
Product capture
Review plant positions, mature spread and layout directly on the aerial image.
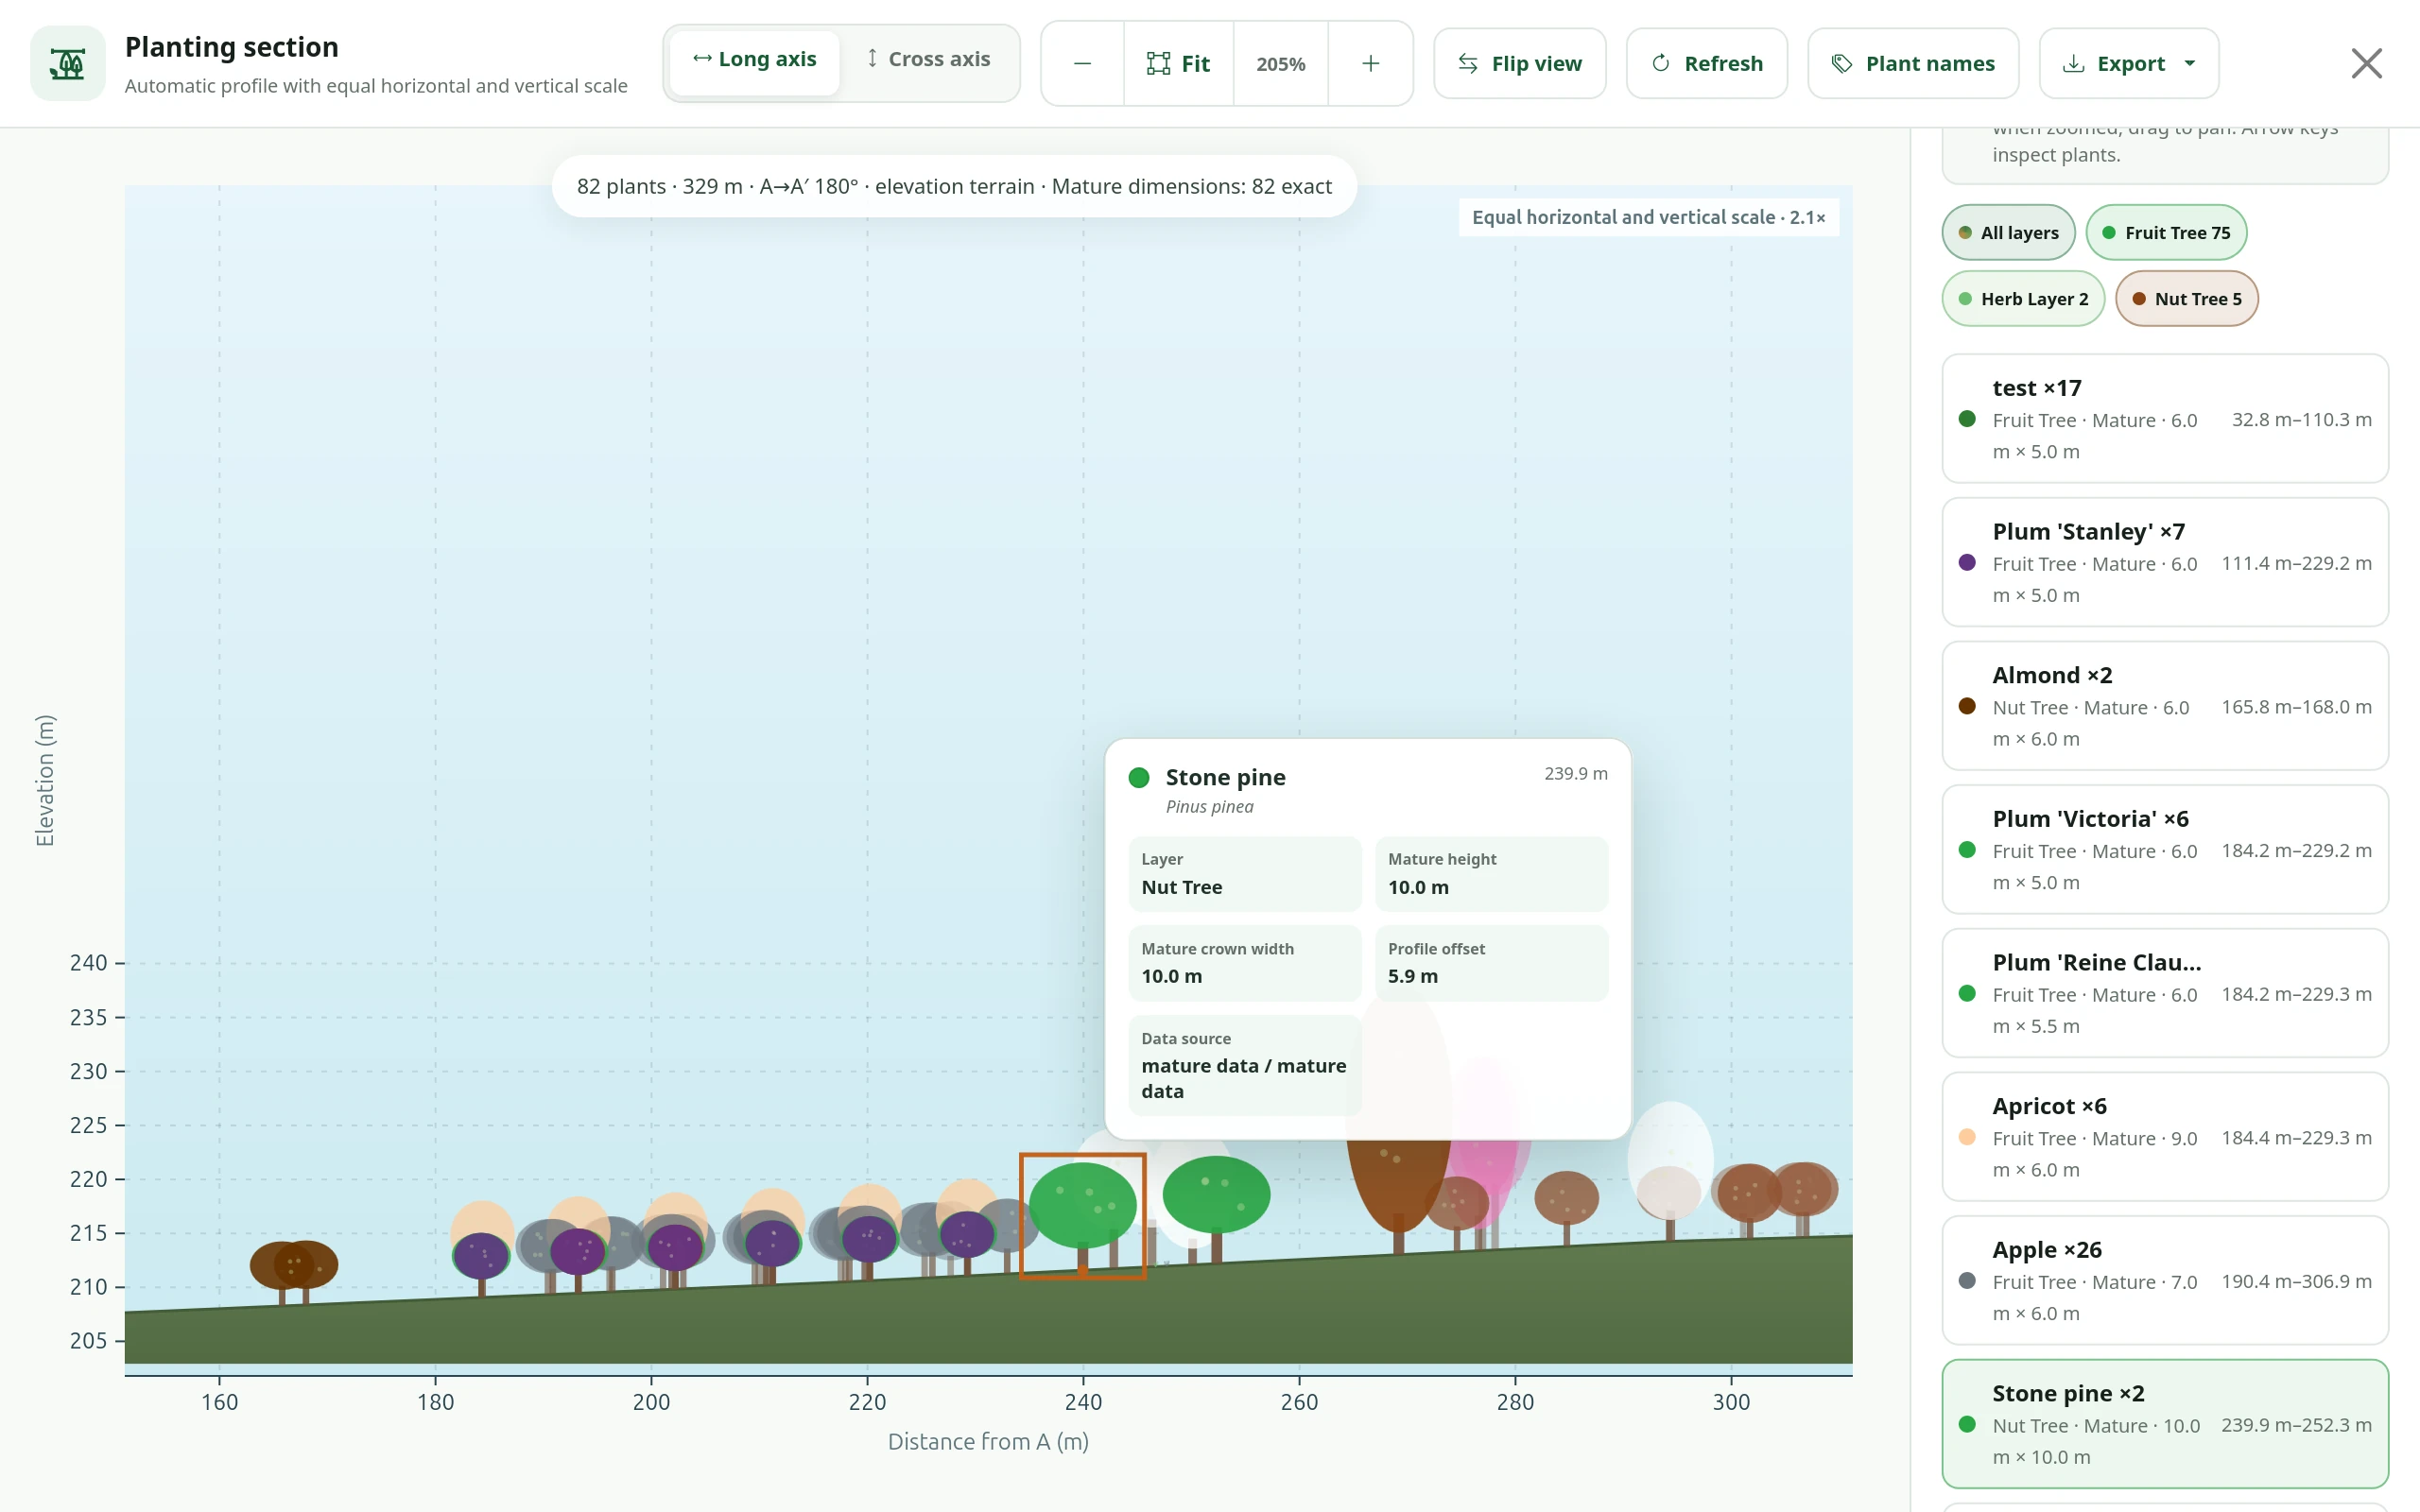 Product capture
Review mature plant heights, crown widths and terrain elevation together in an exportable profile view.
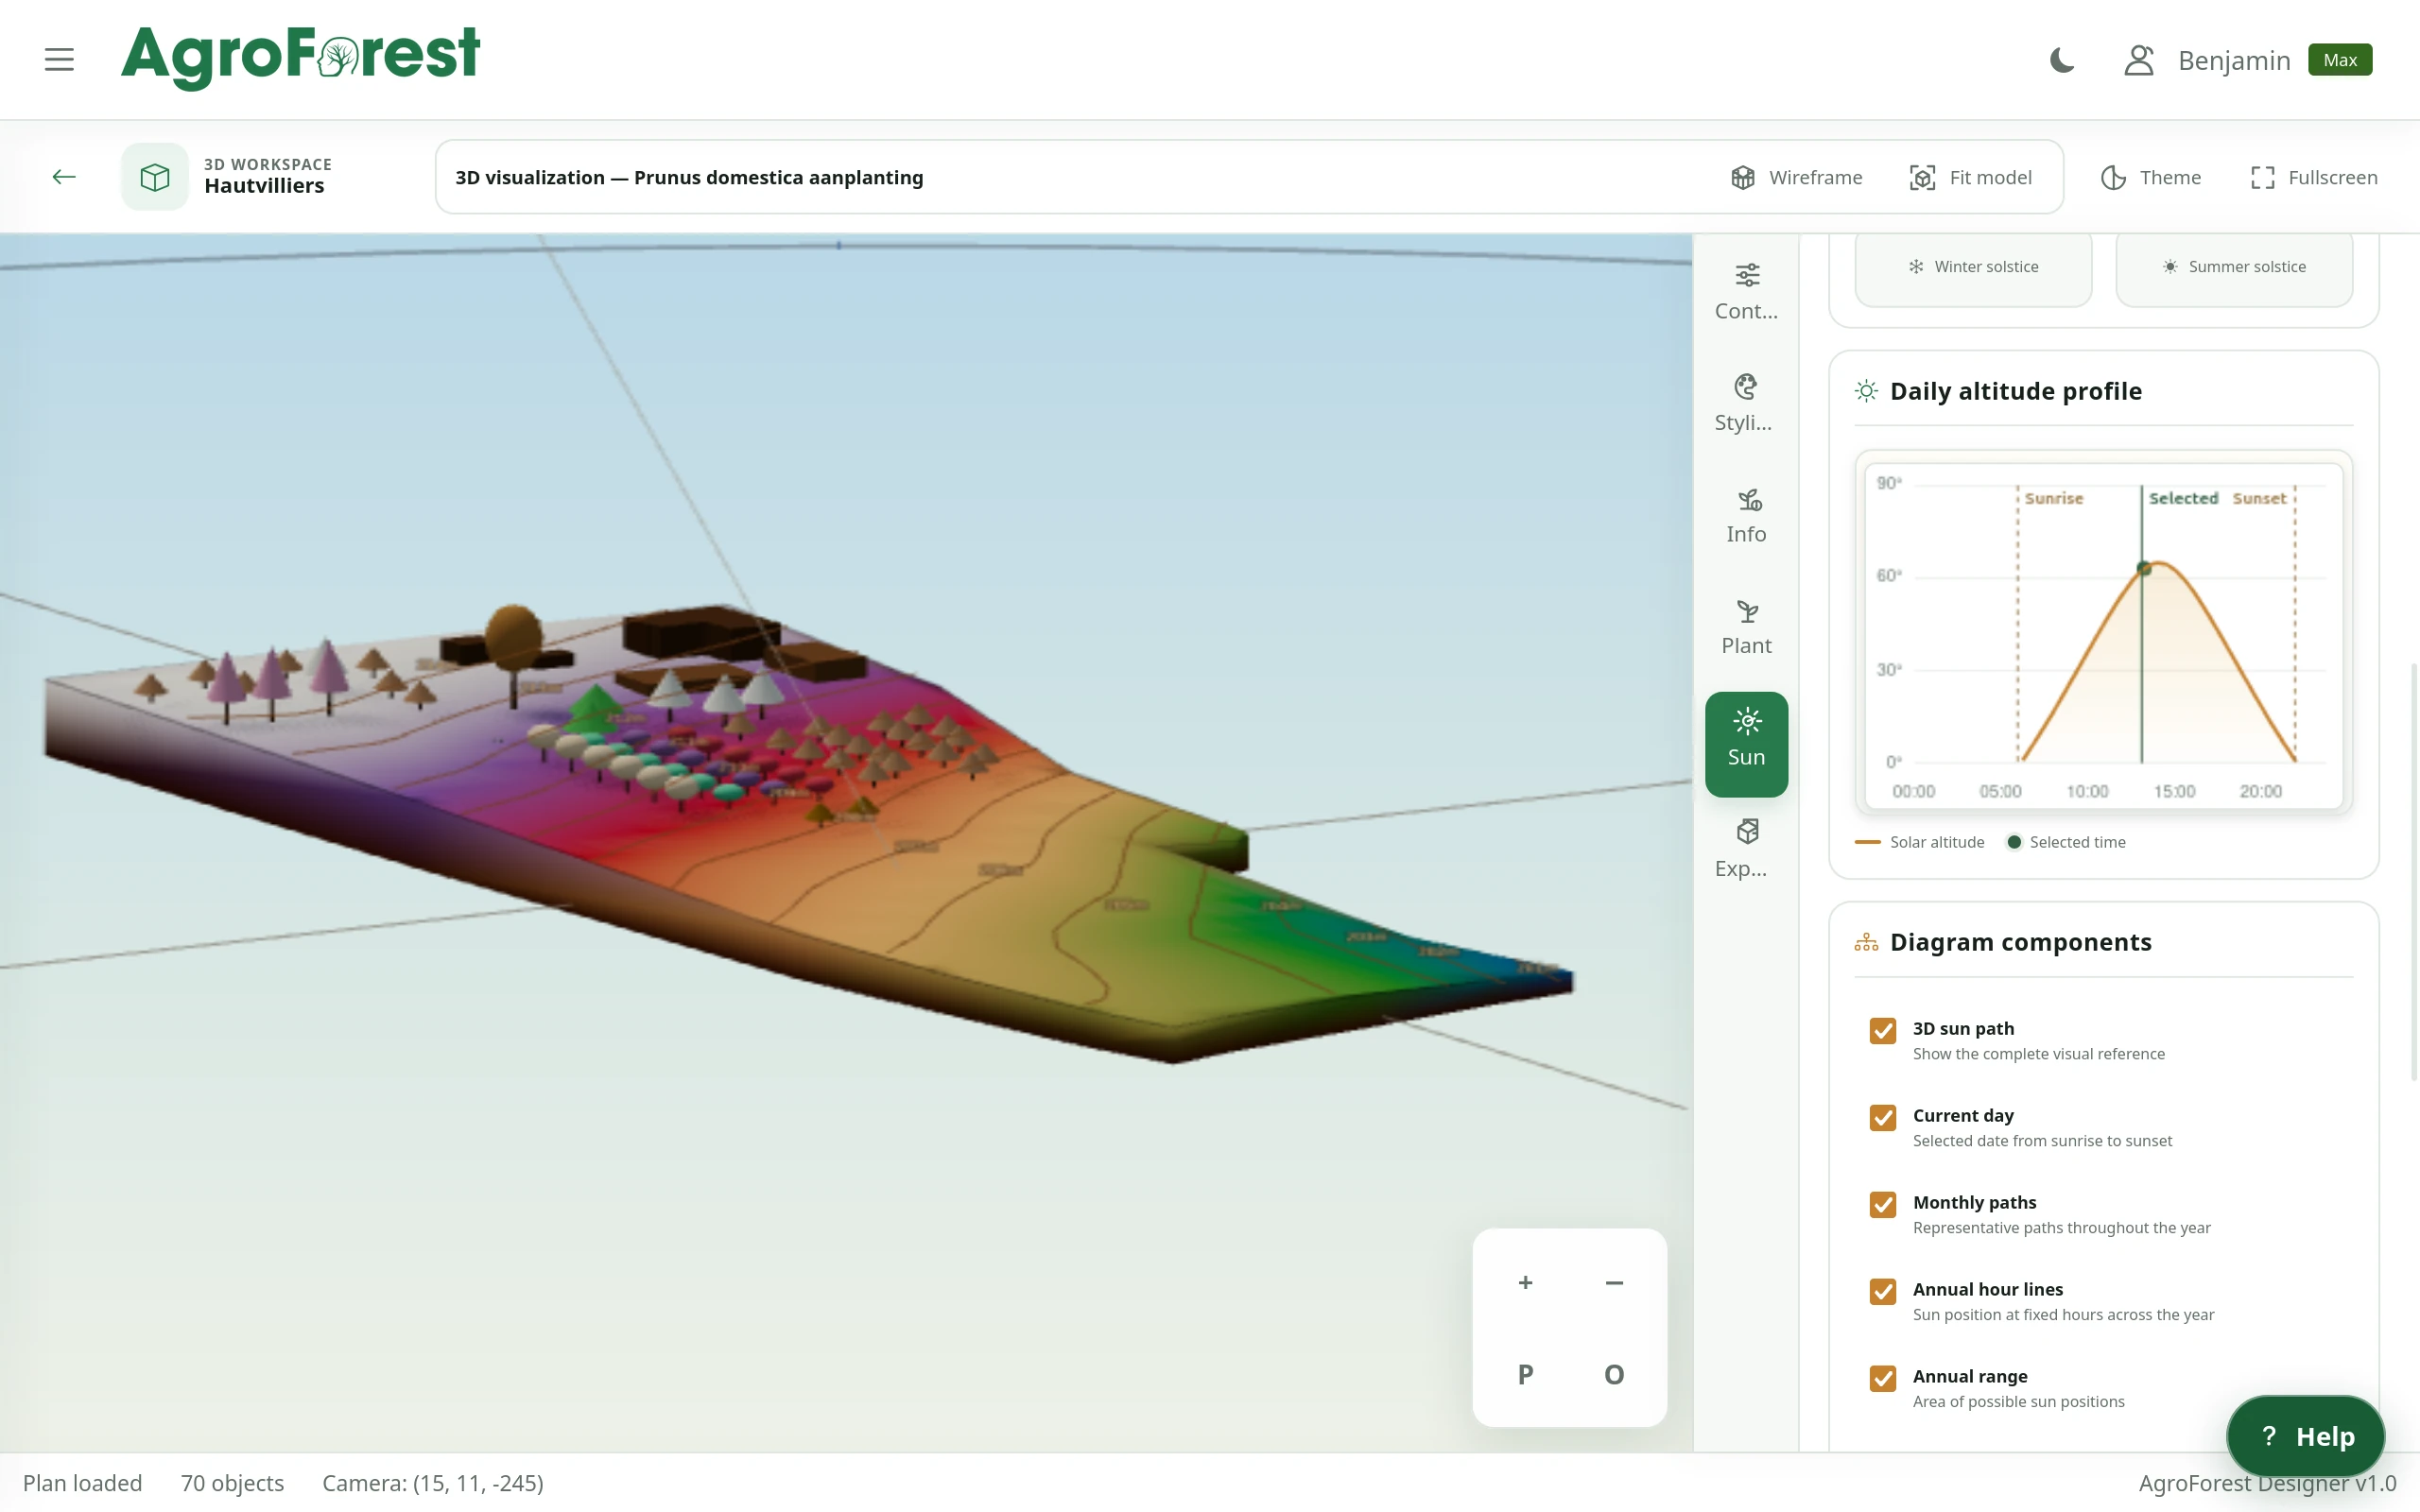 Product capture
Explore the planting plan and terrain in 3D while reviewing the sun path and seasonal light conditions.
FAQ
Yes. The service terms permit commercial design and consultancy use.
The planner provides a plant inventory. With Pro and Max, professional tools include PDF and SVG technical drawings, 3D visualization, plan viewing links and GIS workflows. Check the current feature comparison and review the exported result before issuing it.
Yes, with a plan that includes QGIS interoperability. Export the saved plan as a GeoPackage, or use the official AgroForestDesigner Sync plugin to preview and synchronize supported spatial changes. A downloaded package is a snapshot; it does not update the browser plan by itself.
Create a plan sharing link and send it to the intended reviewers. Anyone with an active link can view that shared plan until you deactivate the link. It is a viewing workflow, so manage links deliberately when a project contains private site information.
No. Generated layouts, recorded growth dimensions, terrain and indicative shade views support your review. Verify the site, plant suitability, construction requirements and client brief before treating a proposal as ready for implementation.
Pro and Max include professional visualization, technical drawings and plan sharing. Max provides unlimited projects, recipes and cultivars. Compare current allowances and features on the pricing page.
Review supported outputs and access requirements before choosing how to share a client project.
Check exported layers and how supported changes synchronize with the saved plan.
Follow the documentation for drawings, viewing links and implementation records.
Review current project capacity and professional feature access.
Your design starts here
Start without payment details. Add capacity or professional features later, when your project needs them.